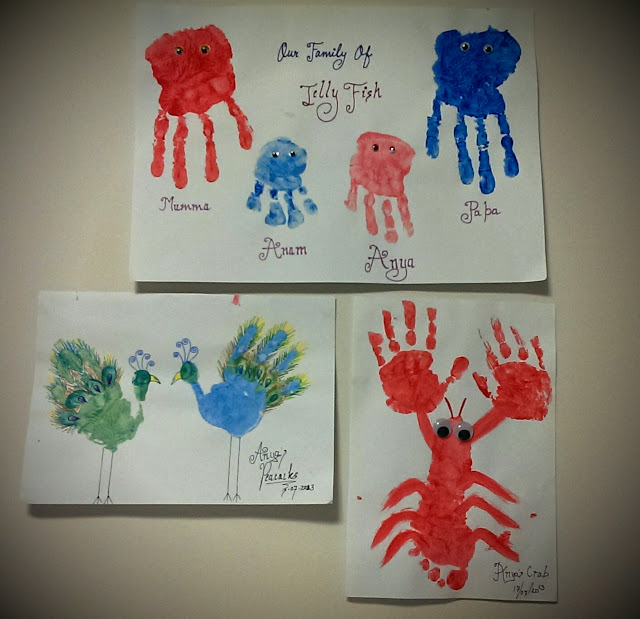
Posts

Showing posts from July, 2013

Meluha Conquered

Image
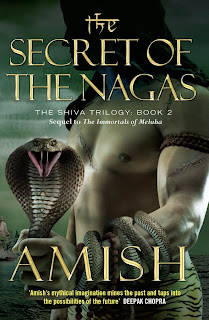
Or visited....I should be saying.. :) What I really mean of course is that I've finished the first book in the Shiva Trilogy by Amish Tripathi - The Immortals of Meluha. Its a good book. I wont say one of the best ones I've read...because I am kinda more into lengthier books. But it is a great book nonetheless, because of the ideologies and philosophies put forth by Amish. He has very cleverly experimented with the tales of Indian Mythology and how they are relevant in today's modern world.  Amish has put it beautifully in his worlds. Its like he's mirrored my thoughts on the whole "God" theory. "God is one, though different religions approach Him differently. Call Him Shiva, Vishnu, Allah, Jesus or any other form of God that you believe in.  Our paths may be different. Our destination is the same." The one...the almighty...the energy that fuels the world! I already have started the next book...The Secret of the Nagas and it

String Painting

Image
So Anya came from her play school last evening with a finishing string (we'll make more at home and then I'll share with all of you) and some extra string (simple thick wool). And she told me she wanted to paint with the string. She had no idea how though. the string was tied to a straw on one end and the other end was loose so she liked the idea of moving around the string by controlling the straw. But this reminded me of the thread/ string painting we used to do as kids....so I put hubby dear on the duty to take care of the lil monster and we gathered the supplies needed. Paints String (wool or any string should be fine) Paper a keen toddler !! :) Thats it ! And doing it is even simpler...just dip the various threads in different colors and put them on a sheet of paper (creased in half)...let the clean ends stay out of the sheet a bit. Then just fold the sheet(with the paint dipped threads inside the fold)..and press and squish and move the thread

Paper Bag Puppets

Image
Been a busy weekend for us...with lots of cooking and the company of good friends...and the usual grocery shopping! But this time, papa also got a wine bottle..so obviously we got a long brown paper bag...so what an amazing little thing for the kiddos to have endless fun... We made it into a snake ..n both the kiddos enjoyed playing with and taking turns with our paper bag puppet snake!....sssssssss..... Can't leave an opportunity to be kreative! Hope you all had a gr8 weekend too!

Problems with commenting on the blog

A lot of readers have reported facing problems while trying to comment on various posts on the blog...I am sorry for the inconvenience this may have caused you... It's unfortunate that I am missing out on valuable feedback and suggestions from all of you...I am trying my best to resolve the issue as soon as I can... In case you still seem to have difficulty commenting on the post, please comment/ post on my Facebook page  - The Krafty Mommy  and I will respond and resolve. Thank you for your patience and support! :) TKM

Handprints and Footprints Zoo

Image
After our handprint peacocks...Anya wanted to do more hands and even feet prints....so I searched around and found some great ideas...and we did a few of them... All you need for this fun activity ... Watercolors Paper Some brushes/ sponges Some markers And super-keen and krafty toddlers :p We made a crab by printing one foot as the crab's body..and then 2 handprints on top on each side to make the clasps. Then just used a brush to join the handprints to the footprint..and some legs at the side...and 2 tentacles at the top... Once it dried we added 2 googgly eyes...Done!  If you have not seen the peacocks we did the other day..the post can be found here ...didn't they look absolutely adorable!  We also made Footprint Butterflies for both kids...these r my absolute favorite...must make keepsake for those cute lil feet... And finally (for now) we made our Family of Jellyfish ! So we all pitched in to make thi

For the Love of Reading!

Image
After our lil monster's arrival... I never could find the time and patience to read books again....after having read the Harry Potter series from J.K. Rowling and the Inheritance Cycl e  from Christopher Paolini...and halfway through   The Fellowship of the Ring  ( Lord of the Rings - part 1) by J.R.R. Tolkien ...and many many more singletons....I was looking for something exciting n gripping to get back into reading... Some months ago we got hooked to a TV series about Shiva..  Devon ke Dev - Mahadev ...a God who is more believable...a man with extreme power, skill, courage...someone who didn't just smile and do magical things...someone who could love...who also had extreme anger and showed his rage ...unlike the always smiling and gentle Brahma   and Vishnu.... I ain't a very religious person...that is I don't believe in idol worship on the face...I do believe there is a supreme power above us all...above any explanation.....but the character...the stre

Handprint Peacocks

Image
My darling daughter loves painting with her hands and fingers....more often than not they turn out to b messy paintings...but sometimes you wanna keep the little hand-prints as keepsakes .... Today we turned her little hand-prints into pretty peacocks ...as a reminder for us ....what our beautiful little angel was upto at this age....a few years down the line I am sure she herself would b amazed at how little her creative hands were.... And a keepsake for us for a lifetime! 

Sausages in a Blankie!

Image
So we had these sausages in the fridge and  Anya loves sausages. But I decided to give them a twist today. A twist of bread roll around them that is! ;) I had seen the pics on Picasa a lot and have also found them in the local Chinese bakeries. They are functional of course (no sliding out sausages from bread) but they also look really cute....like babies wrapped in a blankie! :p So I made the bread roll dough as per the recipe Here . And then continued to make the Wrapped Up Sausages. All you need (over n above the dough ingredients) is: - sausages - 1 egg lightly beaten (for basting) - butter to paint the finished rolls with a shine! So when the dough is ready and divided into separate balls, wash n pat dry the sausages. Roll each individual ball of dough into a long snake (lol as anya called it! - read pipe). Now just roll the snake..umm blankie! Around the sausage like such. Make sure to tuck in the head n tail. And let the baby breathe! Leave  the h

TGIF ! Update

Image
Friday...yay! A relaxing day for me n kids. A day off.... thinking about the cleaning and cooking n the groceries! Huh.... But these days every new day also asks me..how are we being creative today.... We don't have to plan out a recipie based craft for everyday. Sometimes it's just the usual stuff that we can do a lil more creatively. Like last night, while doing the usual salad before dinner, I was being badgered by Anya to do some activity. Ohk sure... I said, and handed her 2 big leaves from the lettuce , a lil paint and a sheet of paper...and there she was happily stamping the lettuce with paints on the paper...and it came out really nice too ! Today started nice and slow, with a bit of screen time for the kids(tv and tablet games) and then some block building (read throwing them around, thanks to my lil monster). Then Anya spent an hour or more playing with her favorite Flubber Gak. It sure is the highest ranking activity we have ever undertaken. She even used her

Making Time to Craft

Image
Very often we find ourselves (including me) make this excuse for not crafting..."Where's the Time?" And now that I have started on my blog and the facebook page (a lil more actively), a lot of my friends are actually wondering "HOW?" and calling me "SuperMOM". Well I've been there, so I thought I'd share my feelings with you'all. It was months ago that one of my friends also on maternity leave (like myself) discussed the topic of blogging with me. And the only unknown there was - "about what?". We aren't really whiz women or professors of any sort that we could enlighten the world with something new. But it is not about new. Nor enlightenment.  The crafting bug has forever resided deep inside of me. I just brought it out at times, played with the little thing and then imprisoned it again deep down inside. It made me happy when it was out. But I never could find the time to let it free. But if we do not have time to do

The Flubber Gak

Image
Tuesdays are always troubling at our place as its the first day of the week at the childcare inor the kiddos and they are really tired after a full day of play there....but since Anya has been eagerly awaiting making n playing with 'gak' for a few days now..she was eager to get to it as soon as we entered the house... It was by far the most fun n intriguing activity we've done so far....even for Anam! Although he couldn't make the gak...he did have his share of playing with the strange slushy slippery yuk! Of course under strict supervision! For the fun n excitement that it has provided ..this is a really simple project... Supplies needed... 1) 3 cups warm water 2.) 2 cups white PVA glue 3) 2 tsp Borax (found in the laundry n cleaning isle in the local supermarket) 4) Watercolors in the desired shade 5) Glitter (optional) 6) a big bowl & a small container  1. In the small container, mix the borax in 1 cup warm water until it completely dissolves. 2. I

Heart Stamper

Image
Weekend is a time to finish of the household chores for me...but also the time when we can relax a bit and indulge the kiddos...so a quick and simple stamp painting was all that Anya needed..n a simple empty toilet roll tube and a few paints..what we needed... And she enjoyed stamping away all afternoon...and even learning a bit about colors....that yellow and red make up orange... We even managed to create a bubble heart :) yayy...fun unlimited...stamp stamp stamping!

The Edible Finger Paints

Image
My princess loves painting..so nearly everyday she asks me to do some sort of painting...but mostly I end up refusing because of my lil monster...he wants to eat n throw everything...so I can only imagine the mess he'll create if we paint while he is up...not his fault..he is just curious about new things..that is how a 14 month old should behave... So anyways... I came across a finger paint recipie online...n then there were numerous....so I decided to take it on with n for my kiddos... Here's what we did.... Ingredients.. 1/3rd cup flour 2 cups water 1 teaspoon salt 2 tablespoon sugar Food colorings 1. Mix the water, salt and sugar and heat on a low/medium flame in a pan. 2. Add the flour and keep mixing. Dissolve any lumps. 3. Heat the mixture on medium and keep stirring until the desired consistency is achieved. I kept it a little flowy as my kiddos are especially fond of messy painting. 4. Once desired consistency is achieved, divide the mixture into 3/4

We're back ! Update...

Its been a few months since I posted here.....we've been pretty busy at our place with the kids running around and growing up into naughtier brats :p...and me joining back work after the long maternity leave (Bliss!) ...ohh so we've done loads in this while but I just couldn't come back here to share the fun .....but now that we're back, hopefully we'll be more active with sharing our messy adventures ! Look out for our new playdough and paints making recipies soon..lotsa homemade safe stuff being created these days as my lil monster is more inquisitive about putting his hands into everything and anything the big sister is playing with ! Hoping to hear and read your comments ... Until next time.....Keep Kreating !!

Crayon Recycling - Teddy Marble Crayons

Image
A fun activity for my kiddo while de-cluttering the craft drawers...we decided to recycle all our old, broken, mixed up crayons into absolutely cute teddy mixed  marble crayons....As Aanu calls them...magic crayons...various colors within one piece.... here are the basic steps.... 1. Collect n chop mixed up old n broken crayons. 2. Sort them in some colour arrangement (We just sorted then in closer shades) 3. Fill the chopped bits into an ice cube tray (Ours is a cute teddy shape) 4. Put the Ice tray in the oven at 100 degree C for about 10 minutes. (some brands take longer to melt) 5. Take the tray out of the oven and cool on a cooling rack for 10 minutes and then put into the fridge for an hour. 6. Take the tray out of the fridge and push the set crayons out of the silicone tray. VOILA !!! New marble teddy crayons ready for action ! :) We loved to create these fun crayons..tell us if you try !!